7 Practical AI Clothes Changer Uses: Try-On, Ecommerce, and Better Photos
Learn when an AI clothes changer helps, how to choose person and garment photos, what to check in the result, and when you still need a real fitting or photoshoot.
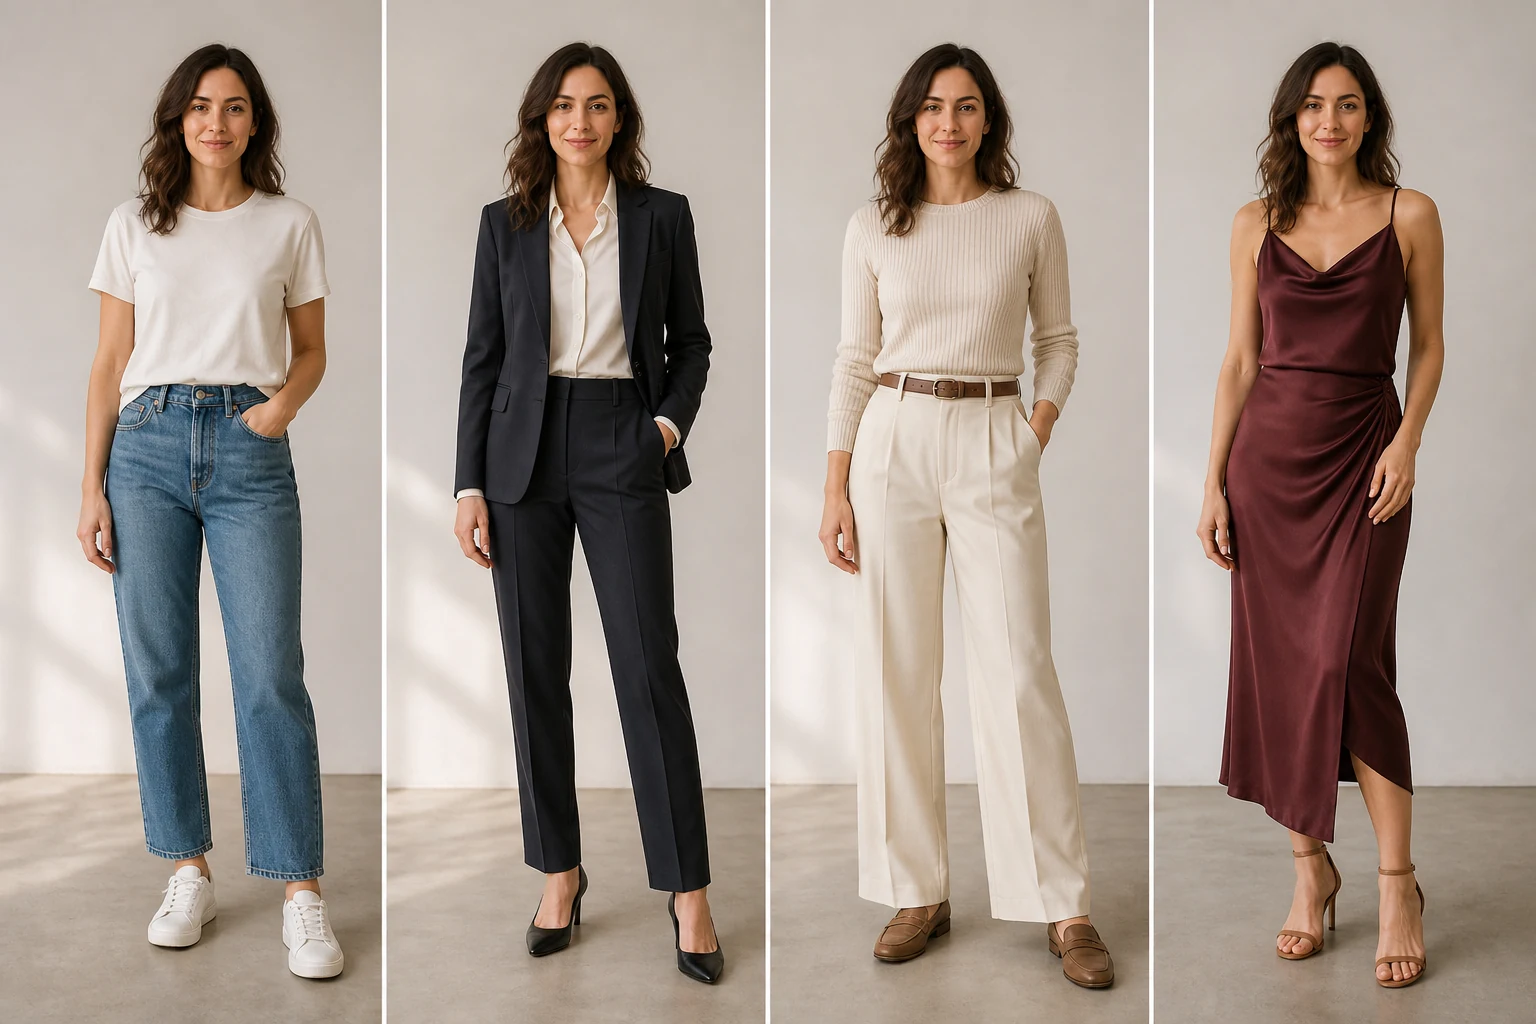
An AI clothes changer is most useful before you commit money, time, or a photograph to one outfit. You might want to see whether a green blazer works with your coloring, turn a casual portrait into a business-profile concept, or put a new blouse on a model before paying for a complete product shoot.
Those tasks sound similar, but they require different inputs and different standards of accuracy. A style preview can still be useful when a button changes slightly. An ecommerce image cannot.
This guide starts with the decision you need to make, then shows you what to upload, what to ask for, and what to inspect before you trust or publish the result.
Quick answer: Use an AI clothes changer to compare visual direction: color, silhouette, layering, occasion, and overall styling. Do not use a generated image to decide size, physical comfort, fabric performance, or exact fit. For those questions, check the garment measurements, size chart, reviews, and a real fitting when possible.
Reviewed and updated: August 12, 2026
Author: YuzuTime Editorial Team
Editorial scope: This guide is for visual planning and responsible photo editing. It does not provide sizing, tailoring, body-measurement, or purchasing advice.
Image disclosure: The images in this article are AI-created editorial illustrations of the workflows described. They are not unedited product benchmarks or a promise that every input will produce the same result.
What people actually use an AI clothes changer for
People rarely arrive with the abstract goal of "editing clothes." They have a more concrete problem:
| The question in the user's head | Useful output | What the output cannot prove |
|---|---|---|
| Would this style suit me? | A visual comparison on the same person photo | Correct size or physical comfort |
| Is this outfit right for an event? | A dress-code and color concept | Whether the real garment will hang the same way |
| Can I improve this portrait without reshooting? | A professional, casual, or occasion-based wardrobe edit | An untouched documentary photo |
| How might this garment look on a person? | An early on-model ecommerce or campaign concept | Exact product construction or fit |
| Can I get more content from one shoot? | Outfit variations for a moodboard or draft | Guaranteed brand or product accuracy |
Google's own shopping try-on flow also starts with a full-length user photo and a product listing. That framing is useful: the technology helps a shopper visualize an item on their image. It does not replace measurements or the physical garment. See Google's official virtual try-on guide.
1. Preview an outfit before buying it
You see a jacket on a store page, in a social post, or on a mannequin and want a better answer than "I like it on that model."

Use the preview to compare:
- Whether the color works near your face
- Whether the silhouette feels like your style
- How the garment might coordinate with trousers, shoes, or an existing layer
- Whether the overall look suits work, a wedding, travel, or another occasion
Choose a clear, front-facing or slightly angled photo. The clothing area should be visible, with minimal obstruction from crossed arms, long hair, bags, or furniture. A full-body image helps for a complete outfit; a waist-up photo is usually enough for a shirt or jacket.
For the garment reference, use a flat lay, clean product image, or model-worn photo that shows the full item. If the back, texture, or trim matters, add another reference rather than expecting the model to invent it correctly.
Research on virtual try-on treats garment alignment, texture preservation, pose, and identity as distinct technical problems. That is why a visually plausible preview can still change fine details. The M2E-Try On Net paper gives a useful technical overview of those challenges, while later work on size-controllable virtual try-on shows that size interpretation requires purpose-built controls beyond a normal outfit image.
2. Compare styles without buying a trial wardrobe
Sometimes you do not have one exact garment in mind. You want to know whether to move toward streetwear, a tailored look, relaxed linen, darker colors, or a different silhouette.
Start with presets when the direction matters more than the individual item. In the YuzuTime AI Clothes Changer, you can try Casual, Business Suit, Evening Dress, Streetwear, Denim, or Sportswear without preparing a garment photo.
Keep the person photo fixed while changing one variable at a time:
- Compare three silhouettes in the same color family.
- Keep the silhouette and compare two or three colors.
- Take the best result and test a different layer, such as a jacket or overshirt.
This produces a useful comparison. If you change the pose, background, lighting, hairstyle, and clothing at once, you may like the new picture without learning much about the outfit.
3. Plan what to wear for a specific occasion
"Make the outfit better" is too vague. Describe the situation and the practical constraints.
For a work event, you might ask for:
Replace the current outfit with a charcoal single-breasted suit, a soft blue open-collar shirt, and dark brown shoes. Keep the same adult person, face, body proportions, pose, camera angle, lighting, and background. The dress code is polished business casual, not black tie. Do not add a tie, logo, watch, or other accessories.
For a summer wedding guest concept:
Change the outfit to a modest sage midi dress in matte fabric with short sleeves and a defined waist. Keep the same adult person, face, body proportions, pose, hands, lighting, and garden background. Avoid white, bridal details, transparent fabric, and a floor-length train.
The useful prompt includes the garment, occasion, degree of formality, material or season, details to preserve, and details to avoid. A long list of fashion adjectives is less helpful than a short set of constraints.
4. Change clothes in a professional photo
A strong portrait can outlast the clothes in it. An AI outfit changer can create a draft for a LinkedIn profile, resume, speaker page, freelancer portfolio, or company directory when the face, expression, and background already work.
Match the outfit to the actual role and context. A navy blazer may suit a corporate profile, while a plain knit polo or overshirt can feel more credible for a designer or small-business owner. "Professional" does not always mean a black suit and tie.
Ask whether the clothing change would alter how a viewer interprets a credential, uniform, rank, employer, or event. Do not add medical clothing, military or public-safety uniforms, branded company apparel, academic regalia, or other status-signaling garments that the person did not earn or wear. For formal identity documents, follow the issuing authority's photo rules rather than using a generative edit.
5. Create ecommerce and fashion marketing concepts
Small fashion teams often have a garment photo before they have every model, setting, crop, and campaign image. A clothes changer can turn that garment reference into a reviewable concept and help answer questions such as:
- Which model direction suits the collection?
- Does the blouse work better with light or dark trousers?
- Should the campaign feel like a clean studio catalog or a relaxed lifestyle shoot?
- Which colorway deserves a real production test?

Competitors approach this job in different ways. Fotor and LightX accept a person and clothing reference for outfit visualization. Pixelcut emphasizes putting garments on stock or custom models, while Pincel focuses on a direct person-plus-garment workflow. Features and limits can change; these pages were checked on August 12, 2026.
Whatever tool you use, treat the generated image as a draft until you verify:
- Garment shape, length, neckline, sleeve construction, closures, and pockets
- Color against the original under a known display and lighting setup
- Prints, embroidery, labels, logos, and repeated patterns
- Material weight, transparency, shine, texture, and drape
- Body proportions and how the image represents the customer
For a product detail page, keep accurate real photographs as the primary evidence. If you use a generated supporting image, follow applicable marketplace rules, advertising law, licensing terms, and disclosure requirements. Do not claim that it shows exact fit when it does not.
6. Produce social, editorial, and campaign variations
Creators and marketing teams can reuse a good portrait across several wardrobe directions without rebuilding the entire scene. This helps with thumbnail drafts, campaign storyboards, seasonal concepts, moodboards, and visual testing.
Protect the parts that already work:
Change only the visible clothing to a cream knit top and dark denim jacket. Keep the same adult person, facial features, hairstyle, expression, body proportions, pose, hands, crop, camera angle, light direction, shadows, and background. Do not add text, logos, jewelry, or props.
Generate a small set, choose one direction, and finish exact typography and brand colors in a conventional design tool. Regenerating the whole image to change a headline introduces unnecessary visual drift.
If the result depicts a real person in something they did not wear, get their consent and consider whether viewers need disclosure. Never create a deceptive event photo or imply an endorsement that did not happen.
7. Build a styling brief before a shoot
An AI outfit preview can also be an internal communication tool. A stylist, photographer, client, or creative director may understand one concrete image faster than a folder of disconnected references.
Use the preview to discuss:
- Garment category and layering
- Color relationship with the background
- Crop and pose
- General level of formality
- Hair and accessory direction
Then use real garments and confirmed product details for production. The generated image has done its job once the team agrees on a direction.
Choose the right input method
YuzuTime offers two starting points: a preset style or one to four garment reference images.
| Your goal | Best starting point |
|---|---|
| Explore a broad style quickly | Preset outfit |
| Try a specific garment | One clear garment reference |
| Show front and back construction | Two views of the same garment |
| Build a layered outfit | Separate references for the main pieces |
| Communicate a hard-to-see fabric or trim | Add a close detail view |
More references are not automatically better. Four inconsistent images can give the model four different collars, colors, and silhouettes to reconcile. Give each reference one clear job.
How to get a better outfit change
Use a person photo the requested edit can support
A head-and-shoulders portrait does not contain enough information for a credible full-length dress. A seated pose may hide the waistband and hem. Choose a source whose crop and pose already show the area you want to change.
Reduce occlusion
Arms folded across the torso, a bag strap over a lapel, hair covering the shoulders, or a table in front of the waist forces the model to guess where garment edges belong. Use a simpler image when possible.
Match garment category and view
A front-facing shirt reference is easier to transfer to a front-facing person than a side-view runway image. If you replace a T-shirt with a long coat, expect the model to invent more of the body boundary and background.
Say what must stay unchanged
Name the few details that matter: identity, body proportions, pose, hands, background, camera angle, and light. For the garment, name its color, length, collar, sleeves, closures, material, and any essential construction detail.
Compare versions on the same source
Use one source image for all candidates. This prevents a stronger pose or more flattering light from deciding the comparison for you.
Inspect the result before you use it
Do not approve an outfit change from a small thumbnail. Zoom in.

Use this checklist:
- Person: Does the face, hairline, skin tone, expression, and body proportion still resemble the source?
- Hands and edges: Are fingers, cuffs, straps, hair, and garment boundaries natural?
- Construction: Do the collar, lapels, pockets, buttons, zipper, sleeves, and hem make sense?
- Pattern: Do checks, stripes, prints, or knit structures continue across folds and seams?
- Material: Does denim, wool, silk, leather, or linen respond plausibly to the light?
- Scene: Do shadows and reflections match? Did the model bend the background or move objects?
- Claim: Could a viewer mistake the image for evidence of exact fit, a real event, or an unedited product?
If an important detail is wrong, make one focused revision. If the model repeatedly changes the product or person, return to a real photograph or a more controlled editing workflow.
What an AI clothes changer cannot tell you
An outfit image can show a visual idea. It cannot measure the body or garment from pixels alone, confirm ease at the shoulders, tell whether a waistband feels comfortable, or predict how fabric behaves after hours of wear.
For a buying decision, pair the preview with:
- The brand's garment measurements and size chart
- The model's stated height and worn size, when available
- Fabric composition and stretch information
- Reviews from people with relevant measurements
- The retailer's alteration and return policy
It also cannot guarantee exact product color, pattern placement, logos, text, stitching, or drape. Transparent materials, very small details, unusual poses, low-resolution inputs, and covered garment areas are especially difficult.
Use person and garment photos responsibly
Upload only photos you own or have permission to edit. Get consent from recognizable people, avoid confidential images, and read the current YuzuTime Privacy Policy before submitting sensitive material.
For commercial work, confirm that you have rights to the garment photography, model image, logo, artwork, and generated output. Do not use wardrobe edits to impersonate someone, fabricate an endorsement, misrepresent a product, or create abusive or sexualized content.
A practical first attempt
Choose one clear person photo and one decision. If you are exploring, start with a preset. If you are evaluating a specific item, upload one clean garment reference and add a second view only when it contributes necessary information.
The YuzuTime AI Clothes Changer accepts a person photo, six preset style directions, or up to four garment references. Generate the preview, inspect identity and garment details at full size, and keep the result only if it answers your original question.
A finished image is only one possible outcome. You may instead decide that the green jacket is worth trying in person, the formal portrait needs a real reshoot, or the rust blouse deserves a full ecommerce production day. The preview has still answered a useful question.
Frequently asked questions
What is an AI clothes changer?
An AI clothes changer is a generative image tool that replaces visible clothing in a person photo using an outfit preset, written description, or garment reference. It creates a new image rather than physically measuring the person or clothing.
Can I virtually try on clothes from an online store?
Yes, if you have permission to use the images and the tool accepts a garment reference. Upload a clear photo of yourself and a complete product image. Use the output to judge style direction, then rely on the retailer's measurements and return policy for fit.
What photo works best for changing clothes with AI?
Use a sharp, evenly lit, front-facing or slightly angled photo. Keep the intended clothing area visible and reduce obstruction from arms, bags, hair, furniture, and other people. Match the crop to the garment you want to change.
Can an AI clothes changer predict my size or fit?
No. A standard clothes changer creates a visual interpretation. It does not know the garment's physical measurements, stretch, construction tolerances, or how it feels on your body.
Can I use an AI clothes changer for ecommerce?
It can help create internal concepts, campaign drafts, and supporting visuals. Verify every garment detail against real product photography, retain accurate primary images, and follow applicable marketplace, advertising, licensing, consent, and disclosure rules.
Can I change only a shirt or jacket?
That depends on the tool and input. A focused garment reference and a clear source photo can help, but surrounding layers, hair, arms, and accessories may also be regenerated. Inspect the full image after every change.
How many clothing references should I upload?
Use the fewest references that fully explain the garment. One clean front view is often enough. Add a back, side, or detail view only when it shows information the first image does not.
Related YuzuTime tools
AI Clothes Changer
Choose a preset style or upload up to four garment references to create an outfit preview from a person photo.
AI Photo Editor
Make a focused follow-up edit when an outfit result needs a more specific change.
AI Background Remover
Prepare a cleaner garment or person reference when the original background is distracting.