

1
Upload your portrait
Choose a sharp photo with your face, eyes, and nose bridge clearly visible. A front-facing image gives the model the cleanest reference.
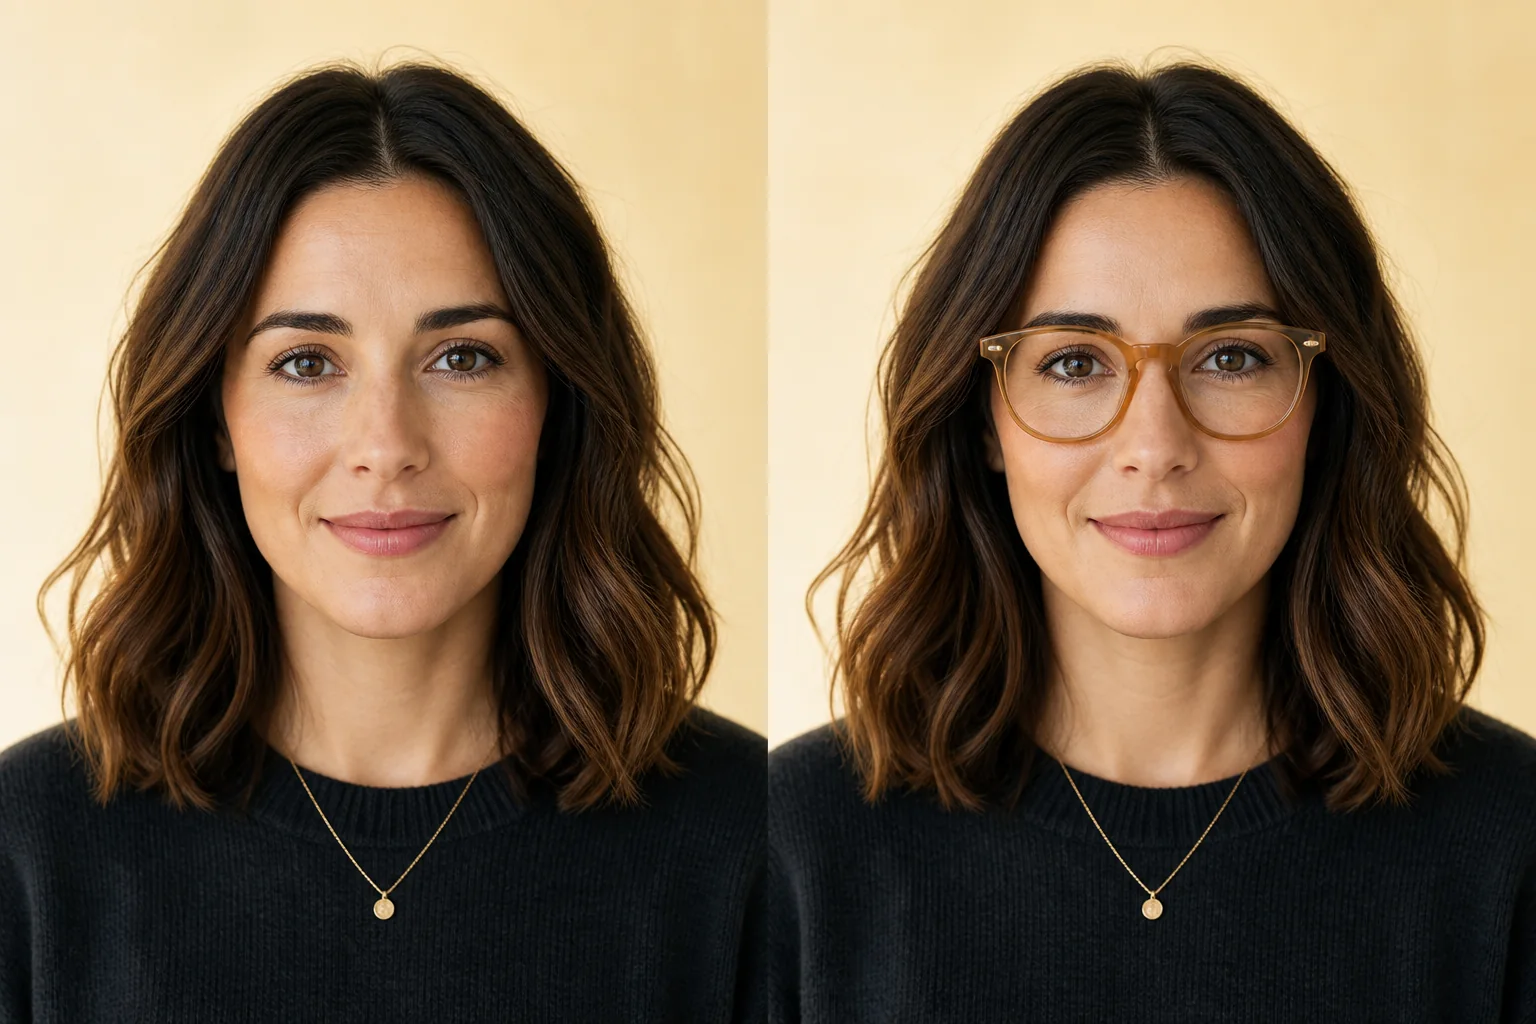
Glasses preview
Recent glasses previews
MoreNo recent glasses previews yet.
Three image-first steps
This is a generated photo preview. It combines your portrait with the eyewear reference rather than placing a live AR overlay over a webcam feed.
Choose a sharp photo with your face, eyes, and nose bridge clearly visible. A front-facing image gives the model the cleanest reference.

Upload a product photo or screenshot that shows the full frame. Straight-on eyewear with a simple background is easier to interpret.

Create the preview, check the frame shape and color on your face, then download it or try another pair.
Image examples
A useful preview does more than place a frame somewhere near the eyes. Compare the full image first, then inspect the bridge, rims, temples, lens treatment, and facial symmetry at a larger size. These fictional examples illustrate the review process; they are not product-sizing guarantees.

Keep the portrait, crop, and lighting stable so the frame is the main visible change. This makes shape and color easier to judge.
Zoom in to check the bridge, rims, temples, lens transparency, and whether both eyes remain naturally aligned behind the frame.
Generate each option from the same portrait whenever possible. A consistent face angle, crop, expression, and light make differences between frames easier to see and reduce the chance that you are reacting to unrelated image changes.
Look for balanced coverage across the face. A visual preview can show proportion, but it cannot confirm the listed millimeter width.
Check whether the bridge appears centered and whether the frame sits too high or low. Confirm real bridge sizing with the retailer.
Compare how round, rectangular, cat-eye, aviator, or geometric rims relate to your eyebrows, cheekbones, and overall face outline.
Notice whether clear acetate, dark rims, metal, or a bright color supports the look you want under the portrait's lighting.
Review clear, tinted, gradient, or reflective lenses carefully because AI may simplify reflections or transparency.
Check the sides of the frame for obvious distortion, then remember that a still image cannot predict hinge pressure or comfort.
A photo-based workflow is useful when you already have a frame image, want a stable side-by-side comparison, or prefer not to use a webcam. It helps with style decisions, but it cannot tell you whether a frame will fit comfortably.
Use the exact product image or screenshot you are considering instead of choosing only from a built-in catalog.
Keep the same source photo while you compare round, square, thin metal, acetate, or sunglass frames.
Use the result to narrow your options, then confirm measurements, prescription details, and physical comfort with the retailer or an optician.
Preview a frame from a retailer page before deciding whether it belongs on your shortlist.
Compare frame shapes, colors, materials, and lens treatments on a familiar photo.
Test a bolder look or tinted lenses without needing a live camera session.
Download a preview when you want feedback from a friend, family member, or stylist.
You provide a portrait and a glasses image. The model creates a new still image. This works well for specific product screenshots and stable comparisons, but generation may change small details.
A retailer maps a digital frame onto a live camera view or recorded face scan. It is faster for moving between catalog items and may include calibrated sizing, but usually limits you to that retailer's frames.
Results can vary with face angle, lighting, occlusion, image quality, lens reflections, and frame perspective. The preview does not measure pupillary distance, bridge fit, temple length, lens height, prescription compatibility, or physical comfort.
Use it to compare appearance. For a purchase, check the listed frame measurements and return policy. For prescription eyewear, rely on a qualified eye-care professional.
Uploaded images are processed to provide the requested generation. Depending on the selected model, the files may be sent to the processing providers identified in the current policy. Avoid sensitive uploads, and use only portraits and eyewear images you own or have permission to use.
Read the Privacy PolicyYes. Upload a clear portrait first, then upload a front-facing image of the glasses you want to preview. The tool generates a new image with the frame placed on your face.
Yes. You can use a product photo, screenshot, or another clear image of a specific frame, provided you have permission to use it. Front-facing images with the full frame visible work best.
No. This workflow uses uploaded images rather than a live camera feed.
Yes. Upload a clear sunglasses image as the eyewear reference. Dark or reflective lenses may vary more because the model must interpret reflections and transparency.
It is a visual style preview, not a measurement tool. Image quality, face angle, frame perspective, and occlusion can affect the result. Check the seller's frame measurements before buying.
Use a sharp, front-facing portrait in even light. Keep both eyes, the nose bridge, and the sides of the face visible. Avoid strong head turns, hair over the eyes, and existing glasses.
No. A generated preview cannot replace an eye exam, pupillary distance measurement, prescription fitting, bridge assessment, or physical frame sizing.
Uploads are processed to create the requested result. Avoid sensitive images and read the current Privacy Policy for details about processing, providers, retention, and your choices.
Prepare a source image, compare another look, or make a broader edit with related YuzuTime tools.