AI Photo Enhancer vs. AI Image Upscaler: Which One Do You Need?
Learn the difference between an AI photo enhancer and an AI image upscaler, when to use each tool, and how to choose the right workflow for your image.
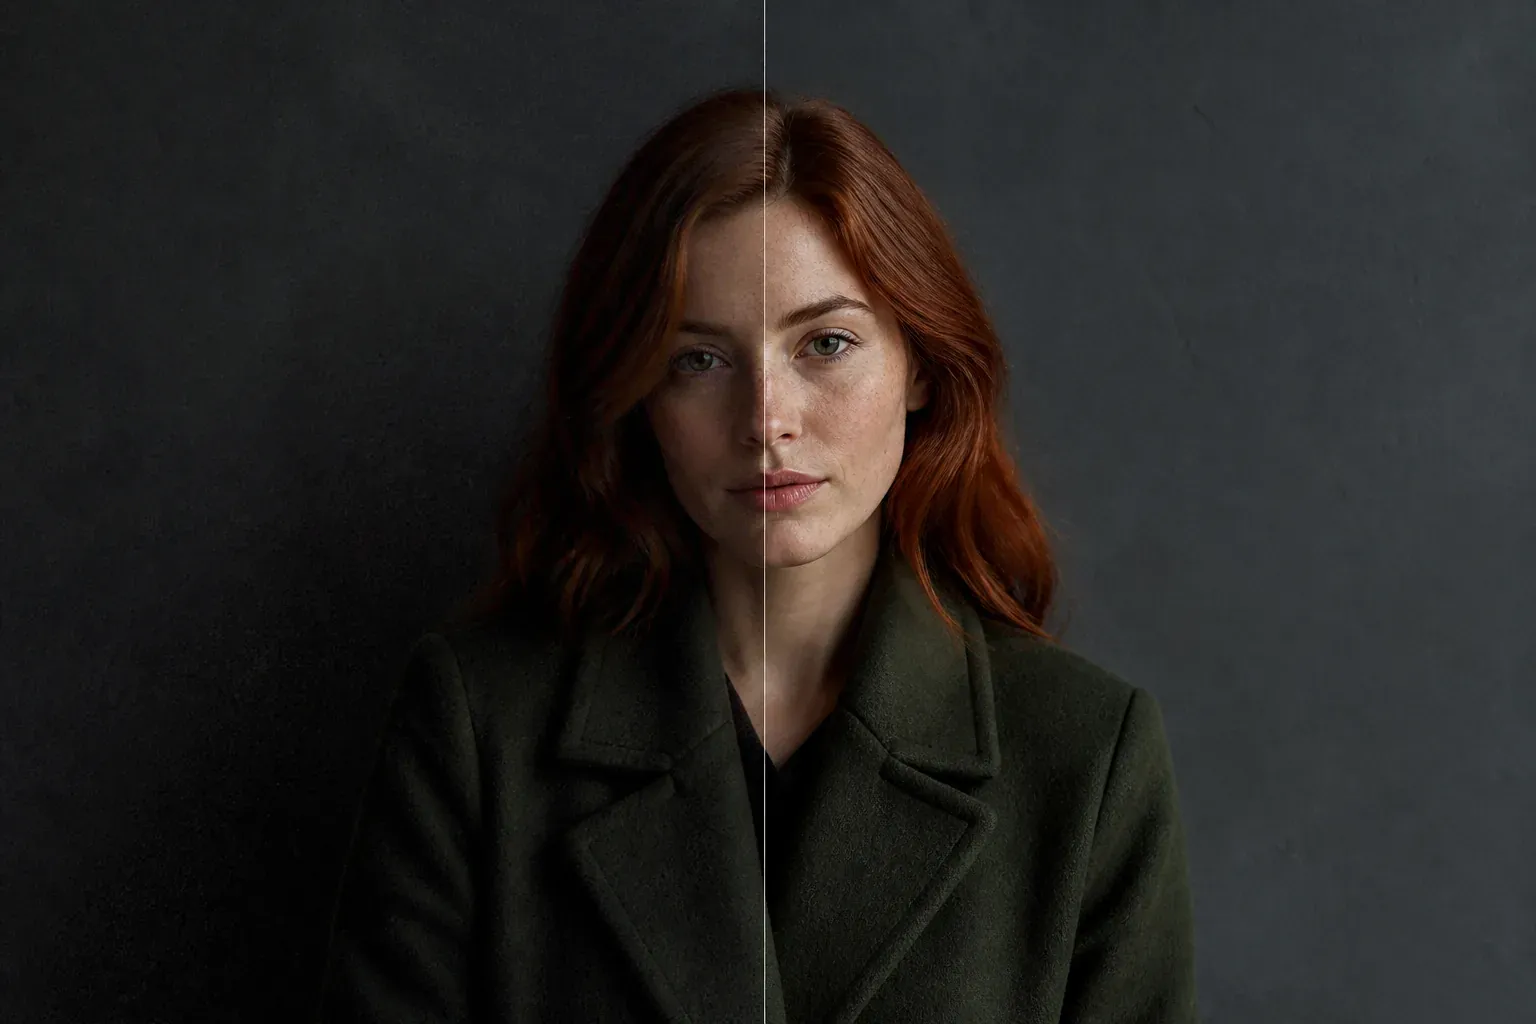
When an image looks weak, it is easy to assume that making it larger will also make it better. That is not always true. A dark, noisy portrait and a clean but undersized product photo have different problems, even if both are described as “low quality.”
That is why an AI photo enhancer and an AI image upscaler should not be treated as interchangeable tools. They overlap, but each starts with a different goal.
Quick answer: Use an AI photo enhancer when the image looks blurry, noisy, dark, faded, or poorly balanced. Use an AI image upscaler when the image already looks reasonably good but needs more pixels for printing, cropping, a larger layout, or a high-resolution display. If the image is both weak-looking and too small, enhance it first and upscale the best result second.
Reviewed and updated: August 2026
Author: YuzuTime Editorial Team
Image note: The side-by-side images in this guide are controlled illustrations created to explain the intended difference between enhancement and upscaling. They are not laboratory benchmarks, and results vary with the source image and model behavior.
AI Photo Enhancer vs. AI Image Upscaler at a Glance
The easiest way to separate the two tools is to ask whether your main problem is how the image looks or how many pixels it has.
| Question | AI Photo Enhancer | AI Image Upscaler |
|---|---|---|
| Main goal | Improve visible photo quality | Increase pixel dimensions and output resolution |
| Typical problems | Mild blur, noise, poor lighting, flat color, fading, facial softness | Small files, pixelation after enlargement, insufficient resolution for a crop, display, or print |
| What AI changes | Clarity, noise, exposure, color, edges, texture, and inferred detail | Pixel count, edges, texture, patterns, and inferred detail at a larger size |
| Best starting image | A photo that is large enough but does not look good | An image that looks acceptable but is too small for its destination |
| YuzuTime choices | 1K or 4K result resolution | 2K or 4K upscale level |
| Common uses | Portraits, phone photos, low-light photos, old photos, product cleanup | Ecommerce assets, AI art, wallpapers, layouts, cropping, displays, and print preparation |
| Main risk | A stronger correction may alter faces, text, or fine texture | A larger file may contain plausible AI-created detail rather than recovered fact |
Both tools can make an image appear clearer. The difference is priority: an enhancer is quality-first, while an upscaler is resolution-first.
Choose the enhancer
The image is dark, grainy, faded, soft, or has weak color, but its current dimensions are already usable.
Choose the upscaler
The image looks reasonably clean, but it is too small for a crop, product page, poster, presentation, wallpaper, or large display.
Use both carefully
The image is both visibly weak and too small. Enhance first, review the result, then upscale only the version worth keeping.
What Does an AI Photo Enhancer Do?
An AI photo enhancer tries to improve the perceived quality of an existing photo. Depending on the image, that can include:
- Reducing sensor noise and JPEG compression artifacts
- Improving mild softness and edge clarity
- Lifting underexposed shadows
- Balancing highlights and contrast
- Correcting white balance and color intensity
- Refining eyes, hair, skin texture, and other portrait details
- Improving faded grayscale detail in an old black-and-white photo
The main question is not “How large should this file become?” It is “What prevents this photo from looking clean and usable?”

When the enhancer is the better first step
Choose the YuzuTime AI Photo Enhancer when:
- A phone photo is dark or grainy but already has enough pixels for sharing.
- A portrait looks flat, soft, or poorly balanced.
- A supplier image has compression artifacts and weak color.
- An old family photo is faded or mildly blurry.
- You want a broad automatic correction without adjusting many manual sliders.
An enhancer can improve mild blur, but it cannot reliably recover a face, license plate, line of text, or distant object that was never captured clearly. The output may look convincing because AI reconstructs plausible detail. That is different from recovering ground truth.
What Does an AI Image Upscaler Do?
An AI image upscaler increases the image's pixel dimensions. Instead of stretching every original pixel into a larger block, it analyzes edges, textures, and patterns, then reconstructs a cleaner-looking high-resolution result.
Upscaling is useful when the source image is too small for its destination. Common examples include:
- A product photo that must fill a larger ecommerce layout
- A small portrait that needs to be cropped
- AI art intended for a wallpaper or print mockup
- An older marketing asset being reused in a new campaign
- A social image being adapted into a slide, banner, or display
- A photo that needs more pixels before print production

When the upscaler is the better first step
Choose the YuzuTime AI Image Upscaler when:
- The image is already well lit and reasonably clean.
- The main limitation is its width and height in pixels.
- A crop leaves too few pixels for the final layout.
- You need a 2K or 4K target for a display or design workflow.
- You want a larger version of an illustration, anime image, or AI-generated artwork.
Upscaling does not automatically turn a bad photo into a good photo. If the source contains strong noise, poor exposure, motion blur, or damaged facial detail, a larger output can simply make those defects easier to see.
What Do Photo Enhancers and Image Upscalers Have in Common?
The overlap between the tools is real, which is why their names are often confused.
Both reconstruct detail
Neither workflow simply reveals a hidden perfect image. AI models infer what cleaner edges, hair, skin, fabric, stone, leaves, or illustrated linework could look like. That reconstruction can be useful, but it should not be treated as factual recovery.
Both can make an image look sharper
An enhancer may sharpen the current image while correcting noise and lighting. An upscaler may produce sharper-looking edges while creating more pixels. The visible result can look similar even though the goal and output size differ.
Both depend on the source
A clear, lightly compressed input usually gives the model more reliable structure to preserve. Severe motion blur, tiny faces, damaged text, heavy compression, and repeated patterns are difficult for both workflows.
Both require review
Inspect faces, hands, text, logos, product shapes, architecture, and repeating patterns at 100% zoom. This is especially important for commercial assets, records, identification, product claims, and any image where exact detail matters.
Which Tool Should You Use for Different Images?
Portraits and selfies
Use the enhancer when the face is large enough but the photo has poor lighting, grain, flat color, or mild softness. Use the upscaler when the portrait looks good but is too small for a profile crop, layout, or print.
Product photos
Use the enhancer to correct weak lighting, compression, color, and surface clarity. Use the upscaler when a clean supplier image is too small for zoom, marketplace layouts, advertising, or a larger crop. Check labels, controls, seams, and product geometry after either process.
Old and black-and-white photos
Start with enhancement when fading, noise, low contrast, or mild blur is the main problem. Upscale afterward only if you need a larger display or print file.

Enhancement is not the same as full restoration. Deep scratches, missing areas, torn faces, and extensive damage usually need a dedicated restoration or manual editing workflow.
AI art, anime, and illustrations
Upscaling is usually the better first choice when the design already looks right but needs a larger canvas. It can refine curves, patterns, brush texture, and linework while increasing resolution.

Text, logos, screenshots, and documents
Use caution with both tools. AI can reshape letters, numbers, interface elements, and logos. If a vector logo, original screenshot, PDF, or source design file exists, use that instead. Do not rely on generative enhancement to reconstruct legal text, medical information, evidence, or other accuracy-critical content.
Can You Enhance and Upscale the Same Image?
Yes. When an image is both weak-looking and too small, the most practical sequence is usually:
- Start with the largest original file available. Avoid a screenshot or messaging-app copy when the camera file still exists.
- Enhance the photo first. Correct noise, exposure, color, and mild softness before creating many more pixels.
- Review the enhanced result. Check faces, text, product shape, edges, and background details.
- Upscale only the best version. Start with a moderate 2K target when preservation matters. Move to 4K only when the destination needs it.
- Review again at 100% zoom. A second AI pass can amplify both improvements and errors.

The reverse order can make sense in a specialized workflow, but it is often less efficient for an everyday photo. Upscaling first creates a larger version of the noise, color problems, and blur that you still need to correct.
Do not repeatedly enhance and upscale the same file. Multiple AI passes can produce crunchy edges, waxy skin, halos, altered lettering, or invented texture.
Should You Choose 2K or 4K?
More pixels are useful only when the final destination can use them.
Choose 2K when:
- The image is mainly for websites, social posts, presentations, or moderate layouts.
- The source is already reasonably clear.
- Preserving a face, logo, product shape, or illustration style matters more than maximum size.
- You want to test the workflow before committing to a larger output.
Choose 4K when:
- A large display, detailed crop, print mockup, wallpaper, poster, or campaign layout needs more pixels.
- The source contains enough useful structure for a stronger upscale.
- You have inspected a smaller result and are satisfied with the reconstructed details.
Remember that “4K” describes an output target, not a quality guarantee. A 4K file can still look artificial, soft, noisy, or inaccurate.
Common Mistakes to Avoid
Enlarging a photo when lighting is the real problem
If the image is already large but dark and grainy, upscaling adds unnecessary pixels. Enhance it instead.
Expecting enhancement to create a print-ready file
An enhanced photo may look much better at its current viewing size while remaining too small for a poster or deep crop. Upscale the reviewed result when the final dimensions require it.
Choosing 4K automatically
The largest option is not always the safest option. Moderate upscaling can preserve faces, linework, text, and product details more conservatively.
Treating invented detail as evidence
AI-generated eyelashes, lettering, facial features, license plates, jewelry, or product texture may look believable without being accurate. Keep the original and compare important details.
Judging only from a fitted preview
A browser preview can hide halos, repeated texture, altered letters, and facial changes. Inspect the downloaded result at 100% zoom before publishing or printing.
Final Recommendation
Use an AI photo enhancer when the main problem is visual quality: blur, noise, lighting, color, fading, or soft detail.
Use an AI image upscaler when the main problem is resolution: the image is too small for its final crop, layout, display, or print workflow.
Use both when the image has both problems, but keep the workflow deliberate: enhance, review, upscale, review again.
Improve how the photo looks
Fix noise, lighting, color, mild blur, and visible detail with the focused enhancer workflow.
Make the image larger
Create a 2K or 4K output for a bigger crop, design, display, or print workflow.
Frequently Asked Questions
Is a photo enhancer the same as an image upscaler?
Does upscaling improve image quality?
Should I enhance an image before upscaling it?
Can AI recover details from a blurry photo?
Which tool is better for old photos?
Which tool should I use for printing?
Is 4K always better than 2K?
Can I enhance or upscale text and logos?
Related YuzuTime tools
AI Photo Enhancer
Improve clarity, lighting, color, noise, and visible photo detail with a focused enhancement workflow.
AI Image Upscaler
Increase image resolution to a 2K or 4K output target for larger layouts, displays, crops, and prints.
AI Photo Editor
Make broader image changes with a text prompt when enhancement or upscaling alone is not enough.